How To Maintain a BMX Bike: Essential Checks for Tires, Chain, Brakes, and Frame
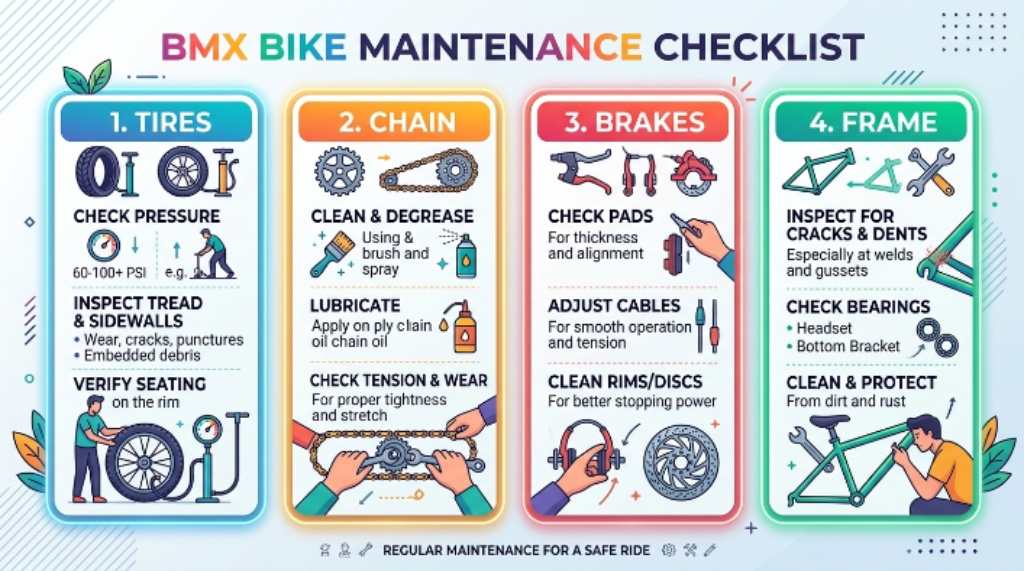
Maintaining a BMX bike starts with four areas: tires, chain, brakes, and frame. Check these parts before riding, then perform deeper maintenance weekly and monthly as needed. A BMX tire can lose several PSI between rides, while a properly lubricated chain can reduce friction across hundreds of pedal rotations. These small checks prevent avoidable failures and help your bike respond predictably.
Start With a Simple BMX Maintenance Routine
A good maintenance routine does not require professional equipment or hours of workshop time. Instead, inspect the bike in the same order before every serious ride. This approach helps you spot small problems before they become expensive repairs.
Begin with the tires and wheels because they control your contact with the riding surface. Next, inspect the chain and drivetrain for movement, dryness, or unusual noise. Then check the brakes, frame, fork, handlebars, and other safety related components.
A useful routine looks like this:
- Tires: Check pressure, tread, sidewalls, and wheel alignment.
• Chain: Check tension, lubrication, rust, and damaged links.
• Brakes: Check pad contact, cable movement, lever feel, and mounting bolts.
• Frame: Check cracks, dents, loose parts, and unusual movement.
• Wheels: Check spoke tension, rim condition, and axle security.
Keep a basic maintenance kit nearby so routine checks remain convenient. A floor pump, tire gauge, bike cleaner, chain lubricant, brushes, Allen keys, and clean rags cover most home maintenance tasks.
Tire Checks That Keep a BMX Bike Predictable
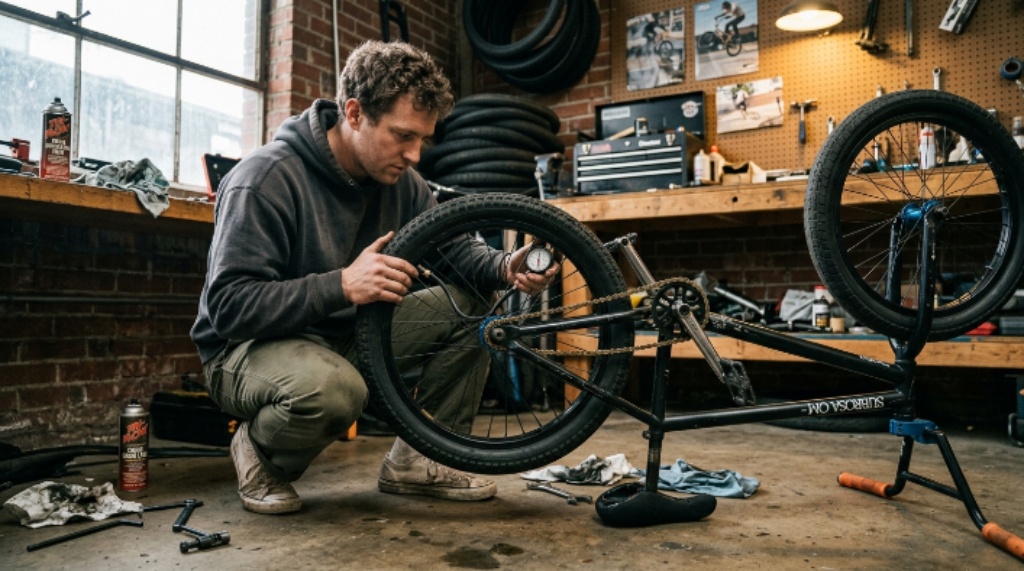
Tires deserve attention before almost every ride because pressure strongly affects BMX handling. Too little pressure can make the tire feel sluggish and increase rim impact risks. Too much pressure can reduce grip and make landings feel harsh.
Check Tire Pressure Before Riding
Use a reliable pressure gauge rather than squeezing the tire with your fingers. Finger pressure can help you notice a completely soft tire, but it cannot provide an accurate reading.
Check the tire manufacturer’s recommended pressure range printed on the sidewall. Then adjust pressure according to your riding surface, tire construction, rider weight, and riding style.
Street riders often want a balance between grip and impact resistance. Park riders may prefer a different pressure from riders who spend most sessions on ramps or concrete.
Never assume yesterday’s pressure remains correct today. Temperature changes, valve leaks, and normal air loss can alter pressure between rides.
Inspect the Tread and Sidewalls
Look closely at the tread for deep cuts, exposed casing, unusual wear, or embedded debris. Remove small pieces of glass or metal carefully before they work deeper into the rubber.
Next, inspect both sidewalls for cracks, bulges, cuts, or damaged areas. Replace a tire when structural damage compromises its ability to contain pressure safely.
Also check whether the tire sits evenly around the rim. An uneven bead can indicate installation problems or damage that requires further inspection.
Check the Wheels and Axles
Spin each wheel and watch the rim as it moves through the fork or frame. Significant side to side movement can indicate a wheel alignment problem or loose spokes.
Hold the wheel and gently push it sideways. Noticeable movement can point toward loose axle hardware or worn bearings.
Check the axle nuts before riding, especially after transportation or repeated hard landings. Secure wheel hardware protects against dangerous wheel movement during tricks.
Keep the BMX Chain Clean, Lubricated, and Properly Tensioned
The chain transfers your pedaling force to the rear wheel. A dirty or poorly adjusted chain can waste effort and increase wear throughout the drivetrain.
Inspect Chain Tension
BMX bikes commonly use a relatively simple drivetrain, which makes chain tension especially important. A chain that hangs excessively can slap the frame or derail during aggressive riding.
A chain that sits excessively tight can create unnecessary resistance. It can also place additional stress on bearings and drivetrain components.
Check the chain tension at several points because chains can develop tight and loose sections. Rotate the crank slowly while observing the chain’s movement.
Adjust the rear wheel position when your BMX design allows chain tension through the axle. Make small adjustments and keep the wheel centered between the frame’s stays.
Clean the Chain Before Lubricating
Lubricant works best when it reaches a reasonably clean chain surface. Applying fresh lubricant over thick grime creates an abrasive paste that can accelerate component wear.
Wipe the chain with a clean rag while slowly turning the crank. For heavier buildup, use a suitable bicycle drivetrain cleaner and a dedicated brush.
Allow the chain to dry before applying lubricant. Then place a small amount of lubricant on each chain section while rotating the crank backward.
After several rotations, wipe away excess lubricant. A clean, lightly lubricated chain usually performs better than an oily chain covered with dirt.
Watch for Chain Wear
Inspect chain links for stiffness, corrosion, damaged plates, or unusual movement. A stiff link can cause skipping and interfere with smooth drivetrain operation.
Listen for clicking or grinding while pedaling. New noises often provide an early warning before visible damage becomes obvious.
Replace a damaged chain rather than attempting to continue riding through serious mechanical problems. BMX riding creates repeated impacts, so drivetrain reliability matters during jumps and tricks.
Maintain BMX Brakes for Reliable Stopping Power
Brakes need consistent inspection because poor braking can turn a manageable situation into an emergency. Even riders who perform mostly tricks should keep their braking system correctly adjusted.
Inspect Brake Pads
Look at the brake pad surface for excessive wear, cracks, contamination, or uneven contact. Replace pads when they no longer provide sufficient material for safe braking.
Make sure the pads contact the intended rim surface correctly. They should not rub the tire because incorrect positioning can damage the tire.
Check both sides for balanced movement. Uneven pad movement can reduce braking performance and create unnecessary rim contact.
Test Brake Lever Feel
Pull the brake lever several times before every serious ride. The lever should move smoothly and provide firm resistance without feeling excessively loose.
A lever that reaches the handlebar can indicate excessive cable slack or another adjustment problem. Investigate the cause before riding aggressively.
Inspect brake cables for fraying, corrosion, kinks, or damaged outer housing. Replace compromised cables instead of relying on temporary fixes.
Check Brake Mounting Hardware
Inspect the bolts securing brake components to the frame or fork. Tighten loose hardware using the correct tool and appropriate manufacturer guidance.
Avoid excessive tightening because small bicycle components can suffer damage from improper force. Use a torque wrench when the manufacturer specifies a torque value.
After making adjustments, test the brakes at low speed. Confirm that the system responds correctly before returning to jumps, ramps, or fast riding.
Protect the BMX Frame From Hidden Problems
The frame carries loads from pedaling, landings, impacts, and repeated tricks. A quick visual inspection can reveal problems before they threaten structural safety.
Look for Cracks and Dents
Clean the frame before performing a detailed inspection. Dirt can hide small cracks, scratches, and damaged areas around important joints.
Pay special attention to welds, the head tube, bottom bracket area, dropouts, and seat tube. These locations experience significant forces during BMX riding.
Look for paint cracks that follow weld lines or unusual shapes. Paint damage does not always indicate structural failure, but suspicious changes deserve closer inspection.
Do not continue riding a frame with a suspected structural crack. Have a qualified bicycle technician inspect it before using the bike again.
Inspect the Fork and Handlebars
Check the fork blades for bends, cracks, dents, or unusual alignment. Also inspect the steerer area because steering components experience repeated impact loads.
Examine the handlebars carefully around the center and bends. Replace bars that show cracks, severe dents, or other structural damage.
Check the stem bolts and handlebar clamp area. Loose steering hardware can create sudden movement during landings or tricks.
Check the Headset
Hold the front brake and gently rock the bike forward and backward. Feel for movement around the headset area.
Any noticeable knocking or play may indicate loose headset adjustment or worn components. Correct the problem before riding hard.
Turn the handlebars slowly from side to side. Smooth movement should occur without grinding, binding, or unusual resistance.
Do Not Ignore the Wheels and Bearings
Although tires receive most attention, wheels also need regular inspection. A strong tire cannot compensate for a loose axle, damaged rim, or failing bearing.
Spin each wheel and listen for grinding or rough movement. Strange sounds can indicate bearing contamination, wear, or another mechanical problem.
Check the rims for dents and significant deformation. A damaged rim can affect tire seating and wheel stability.
Inspect the spokes for unusual looseness or damage. Do not randomly tighten spokes unless you understand wheel tension and truing procedures.
Use a Maintenance Schedule That Fits Your Riding
Not every BMX bike needs the same maintenance frequency. Riding intensity, weather, terrain, storage conditions, and component quality all influence service needs.
Before Every Ride
Perform a quick safety check before serious riding:
- Check tire pressure.
• Inspect tire damage.
• Test both brakes.
• Check chain condition.
• Check axle security.
• Look for loose handlebars or stem hardware.
• Scan the frame and fork for obvious damage.
This inspection takes only a few minutes when you develop the habit.
After Several Riding Sessions
Clean the bike when dirt, dust, or moisture builds up. Wipe the chain and drivetrain before adding fresh lubricant.
Inspect brake pads and cables more closely. Also check the wheels, spokes, headset, crank, and pedals for unusual movement.
Hard sessions deserve closer inspection than casual rides. Repeated landings can loosen hardware that looked secure during the previous session.
During Monthly Maintenance
Perform a deeper inspection of the entire bike. Clean difficult areas and inspect every major connection carefully.
Check chain wear, brake adjustment, wheel alignment, headset play, and drivetrain condition. Review bolts throughout the bike and tighten them according to manufacturer specifications.
Replace worn components before they fail completely. Preventive maintenance usually costs less than repairing damage caused by a neglected part.
Cleaning a BMX Bike Without Creating New Problems
Cleaning removes abrasive dirt that can shorten component life. However, aggressive cleaning methods can force water and grime into bearings.
Use a gentle bicycle cleaner and a soft brush for the frame and wheels. Keep high pressure water away from hubs, bottom brackets, headsets, and other bearing areas.
After washing, dry the bike thoroughly with a clean cloth. Pay particular attention to the chain and metal hardware.
Lubricate the chain after cleaning and drying it. Wipe away excess lubricant so the drivetrain does not collect unnecessary dirt.
Signs That Your BMX Needs Immediate Attention
Some symptoms should never wait until the next maintenance session. They can indicate a safety problem that requires inspection before further riding.
Stop riding and investigate when you notice:
- A cracked frame or fork.
• A tire with structural damage.
• A loose wheel or axle.
• Severe brake failure.
• A badly damaged handlebar.
• Repeated chain skipping.
• Significant wheel wobble.
• Grinding from important bearings.
• Sudden steering movement.
• Hardware that repeatedly becomes loose.
Treat new noises as useful information rather than background sounds. Your BMX often communicates mechanical problems through changes in feel, sound, or movement.
Build Better Habits Around BMX Maintenance
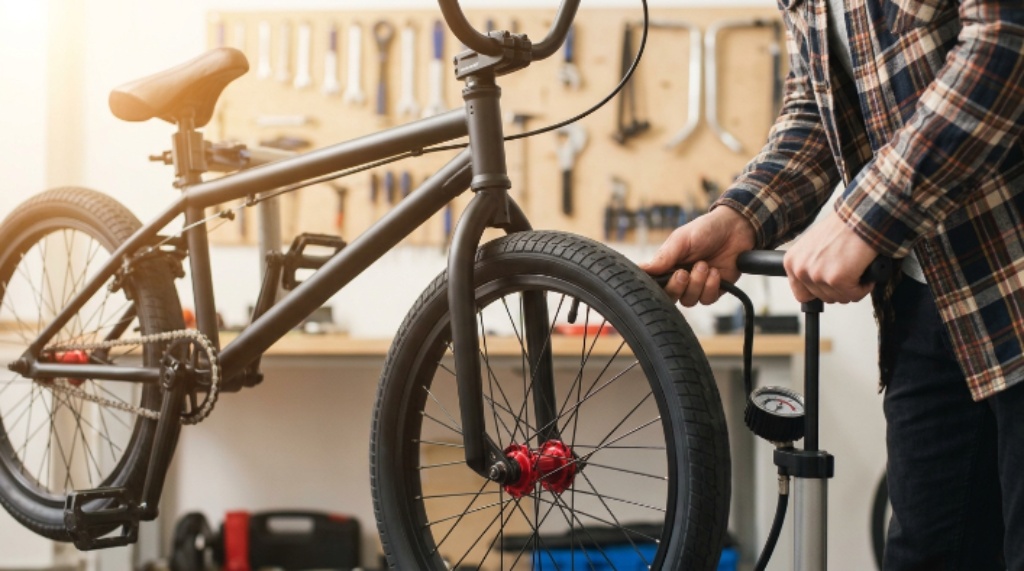
Good maintenance becomes easier when you connect each check with an existing riding habit. For example, check tire pressure whenever you pump the tires.
Clean the chain after particularly dusty sessions. Inspect the frame after hard crashes, heavy landings, or unusual impacts.
Keep replacement parts organized so worn components do not remain on the bike simply because replacements are unavailable. A small supply of suitable tubes, brake components, chain lubricant, and basic fasteners can save considerable downtime.
Record major maintenance work if you ride frequently. A simple note can show when you last replaced the chain, adjusted the brakes, or serviced wheel components.
Common BMX Maintenance Mistakes to Avoid
Many maintenance problems come from simple habits rather than complicated mechanical failures. Avoiding these mistakes can make your routine safer and more effective.
Using Tire Pressure Without Checking the Gauge
Do not rely solely on how the tire feels by hand. Use a pressure gauge whenever you need an accurate reading.
Lubricating a Dirty Chain
Do not repeatedly add lubricant without cleaning the chain. Dirt trapped inside the lubricant can increase wear.
Ignoring Loose Hardware
Do not assume a slightly loose bolt will remain harmless. Repeated BMX impacts can make a small problem worse quickly.
Riding Through Structural Damage
Do not ride aggressively after discovering a suspicious crack or major component damage. Professional inspection provides a safer answer than guesswork.
Overlooking Unusual Sounds
Do not dismiss new clicking, grinding, rubbing, or knocking sounds. Investigate changes before they develop into larger mechanical problems.
A Practical BMX Safety Check Before Every Session
Use this quick sequence when preparing for a ride:
- Press the tires and verify pressure with a gauge.
- Inspect tread and sidewalls for damage.
- Spin both wheels and check alignment.
- Confirm both axles remain secure.
- Move the chain and inspect its condition.
- Apply lubricant only when the chain needs it.
- Test both brake levers.
- Inspect brake pads and cables.
- Check the handlebars and stem for movement.
- Examine the frame and fork for damage.
This sequence covers the components most likely to affect control and safety. With practice, you can complete it quickly without disrupting your riding routine.
FAQ
How Often Should I Maintain My BMX Bike?
Perform a basic inspection before every ride and complete deeper maintenance whenever wear or riding conditions demand it.
What Should I Check First on a BMX Bike?
Start with tire pressure and visible tire damage, then inspect the wheels, brakes, chain, frame, and steering components.
How Do I Know if My BMX Chain Needs Lubrication?
A dry, noisy, stiff, or visibly dirty chain usually needs cleaning and appropriate lubrication.
How Often Should I Check BMX Brakes?
Test the brakes before every ride and inspect pads, cables, and mounting hardware regularly.
When Should I Stop Riding a BMX Bike?
Stop riding immediately when you find structural damage, severe brake problems, loose wheels, or other safety critical defects.
Conclusion
BMX maintenance works best when you treat it as a riding habit rather than an occasional repair job. Check the tires, chain, brakes, frame, wheels, and steering components before demanding sessions. Keep the drivetrain clean, maintain correct tire pressure, secure loose hardware, and investigate unusual changes quickly.
A few minutes of careful inspection can prevent avoidable failures and improve your confidence on the bike. Before your next session, run through the safety checklist and fix anything that does not feel right.