DIY Troubleshooting for a Car AC Not Blowing Cold Air After Compressor Install
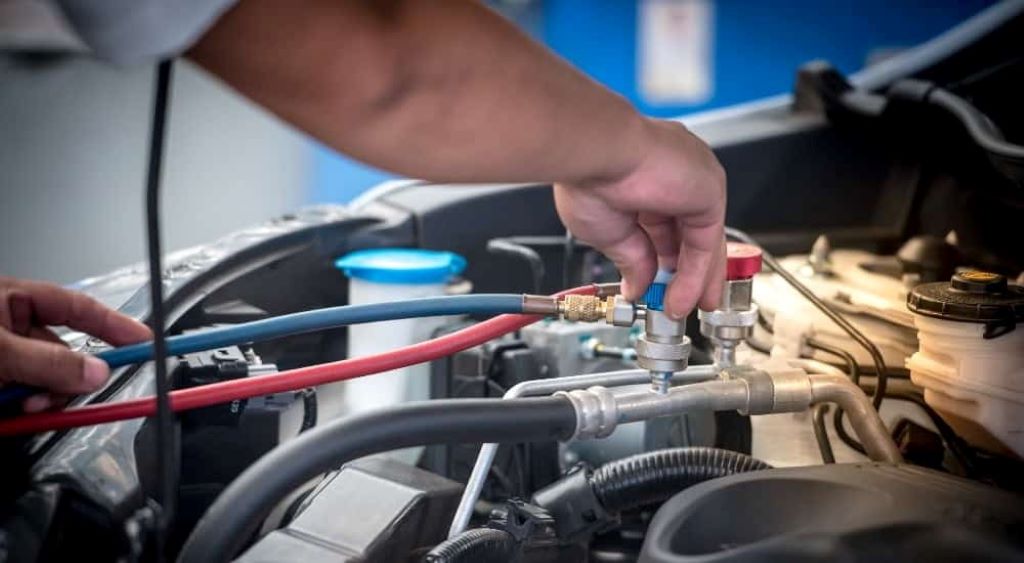
Installing a new air conditioning compressor in your vehicle should restore cool air to your car’s cabin. However, sometimes the AC system doesn’t work as expected even after a fresh compressor installation. This frustrating situation leaves many car owners wondering what went wrong. At Our Auto City, we understand how important a functioning AC system is for comfortable driving, especially during hot summer months.
When your newly installed compressor isn’t delivering cold air, several common issues could be the culprit. Understanding these potential problems can save you time and money. Most importantly, knowing how to troubleshoot these issues yourself empowers you to get your AC working properly without immediately rushing back to a mechanic.
The process of installing ac compressor in car involves multiple components and precise procedures. Therefore, when problems arise after installation, the solution often lies in checking specific areas that commonly cause issues. Many of these troubleshooting steps require basic tools and can be performed by DIY enthusiasts.
Common Reasons Your New AC Compressor Isn’t Working
Several factors can prevent your newly installed compressor from producing cold air. Additionally, some issues may not be immediately obvious during the installation process. Understanding these common problems helps you diagnose the issue more effectively.
Refrigerant levels represent one of the most frequent culprits. Even with a new compressor, insufficient refrigerant prevents the system from cooling properly. Moreover, air trapped in the system during installation can block proper refrigerant circulation. Electrical connections also play a crucial role in compressor operation.
Contamination in the AC system poses another significant threat. Old refrigerant oil or debris from the previous compressor can damage new components. Furthermore, moisture in the system can cause ice formation and prevent proper cooling. These contaminants must be completely removed before installing new parts.
Essential Tools for DIY AC Troubleshooting
Before beginning your troubleshooting process, gather the necessary tools. However, safety should always be your first priority when working with AC systems. Refrigerant operates under high pressure and can cause serious injury if handled improperly.
You’ll need a manifold gauge set to check system pressures. Additionally, a digital multimeter helps test electrical connections and component functionality. Basic hand tools like wrenches and screwdrivers are essential for accessing various system components. A refrigerant recovery machine may be necessary if you need to remove and replace refrigerant.
Professional-grade leak detection equipment can identify small refrigerant leaks that might not be visible. Therefore, consider borrowing or renting this equipment if you suspect a leak in your system. UV dye and detection lights offer another method for finding elusive leaks.
Step-by-Step Troubleshooting Process
Start your diagnosis by checking the obvious issues first. Turn on your AC system and listen for unusual noises from the compressor area. Additionally, observe whether the compressor clutch engages when you turn on the AC. A non-engaging clutch often indicates electrical problems or insufficient refrigerant.
Check all electrical connections to the compressor and related components. Loose or corroded connections can prevent proper operation. Moreover, verify that all fuses related to the AC system are intact and functioning. A blown fuse might indicate a deeper electrical problem that needs addressing.
Examine the system’s pressure readings using your manifold gauge set. Low pressure on both high and low sides typically indicates insufficient refrigerant. However, if the low side shows vacuum conditions while running, this suggests a restriction in the system. According to automotive experts at Consumer Reports, proper pressure readings are crucial for AC system diagnosis.
Refrigerant Level and Leak Detection
Insufficient refrigerant is the most common cause of poor AC performance after compressor installation. Therefore, checking and correcting refrigerant levels should be your first priority. However, simply adding refrigerant without finding the source of any leak will only provide temporary relief.
Use your manifold gauges to check both high and low side pressures. Compare these readings to the manufacturer’s specifications for your vehicle. Additionally, observe how pressures change when the system runs. Steady pressures that match specifications indicate proper refrigerant levels.
If pressures are low, inspect the entire system for leaks. Start with obvious areas like connection points and visible hoses. Moreover, check around the new compressor installation for any loose fittings. Small leaks may require UV dye injection and special detection lights to locate.

Electrical System Diagnosis
Electrical problems frequently prevent new compressors from operating correctly. Therefore, systematic electrical testing can identify issues quickly. Start by verifying that the compressor clutch receives proper voltage when the AC turns on.
Use your multimeter to test voltage at the compressor clutch connector. The reading should match your vehicle’s system voltage, typically 12 volts. Additionally, check the ground connection for continuity. Poor ground connections can prevent clutch engagement even with proper voltage present.
Test the AC pressure switches, as these safety devices can prevent compressor operation. However, remember that low refrigerant levels can cause pressure switches to open, mimicking switch failure. Therefore, verify refrigerant levels before replacing pressure switches.
System Contamination Issues
Contamination from the old compressor or system debris can damage new components quickly. Therefore, proper system cleaning before installation is crucial. However, if contamination occurred during installation, you’ll need to address it immediately.
Signs of contamination include metal particles in the refrigerant, discolored oil, or rapid compressor failure. Additionally, restricted expansion valves or orifice tubes can indicate debris in the system. These restrictions prevent proper refrigerant flow and cooling.
If contamination is present, the system requires complete flushing and component replacement. Moreover, all refrigerant must be recovered and disposed of properly. This process typically requires professional equipment and expertise.
When to Seek Professional Help
Some AC problems exceed DIY capabilities and require professional attention. However, knowing when to seek help prevents further damage and unnecessary expenses. Complex electrical issues or internal compressor problems typically need professional diagnosis.
If your troubleshooting reveals multiple system problems or recurring issues, professional service becomes necessary. Additionally, refrigerant handling and disposal require proper certification in many areas. Therefore, consider professional service for these aspects of repair.
System contamination or internal component damage often requires specialized equipment and expertise. Moreover, warranty considerations may require professional installation or service. Check your compressor warranty terms before proceeding with extensive DIY repairs.
Conclusion
Successfully troubleshooting AC problems after compressor installation requires systematic diagnosis and patience. Most issues stem from refrigerant levels, electrical connections, or system contamination. However, proper tools and safety precautions are essential for effective DIY troubleshooting.
Start with simple checks like electrical connections and refrigerant levels before moving to complex diagnoses. Additionally, remember that some problems require professional attention for safe and effective resolution. Therefore, don’t hesitate to seek expert help when needed.
Regular maintenance and proper installation procedures prevent most AC problems. Moreover, addressing issues promptly prevents minor problems from becoming major repairs. With careful troubleshooting, you can often restore proper AC operation and enjoy comfortable driving again.
Frequently Asked Questions
Why isn’t my new AC compressor turning on? The most common reasons include insufficient refrigerant, blown fuses, bad pressure switches, or loose electrical connections. Check these items systematically to identify the problem.
How long should I wait after compressor installation before expecting cold air? Cold air should appear within 5-10 minutes of system operation if everything is working properly. However, extremely hot ambient temperatures may require longer cooling times.
Can I add refrigerant myself after compressor installation? While possible, adding refrigerant requires proper equipment and knowledge of system pressures. Additionally, most areas require certification for refrigerant handling. Consider professional service for this task.
What causes a new compressor to fail quickly? System contamination, incorrect refrigerant levels, electrical problems, or installation errors commonly cause premature compressor failure. Therefore, proper system preparation is crucial before installation.
How do I know if my AC system has leaks? Look for oily residue around connections, listen for hissing sounds, or use UV dye detection methods. Additionally, steadily dropping refrigerant levels indicate system leaks that need repair.
Read More:

