We talk about
So many topics, so little time.
I've learned that people will forget what you said, people will forget what you did, but people will never forget how you made them feel.
Celebrity
Life
Luxurious lifestyles of your favorite celebrities.
Lifestyle
Trending
A lifestyle typically reflects an individual's attitudes.
Tech
Gadgets
Stay updated with the newest gadgets and tech.

Charleston
Tea Party
In 1774, the South Carolina Gazette reports on the so-called Charleston Tea Party. You’ve heard of the Boston Tea Party, of course. Charleston had one, too!

The Exchange Building where tea was held in 1773. Image credit: George N. Barnard, 1865.

The HMS Britannia carried 7 chests of tea to Charles Town in 1774. Image credit: painting by George Hyde Chambers, 1834
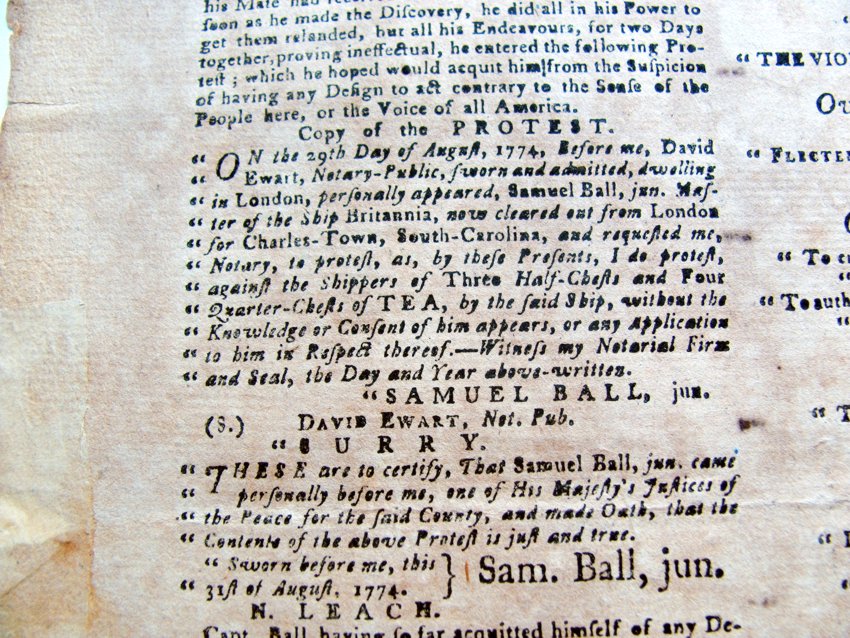
The South Carolina Gazette reported on events relating to the 2nd Charleston Tea Party, published November 21, 1774. Photography: Kyle Brown. All Rights Reserved.
Do You Know!

Charleston’s first "tea party" took place on December 3, 1773, thirteen days before the more famous one in Boston. Charlestonians called a meeting to decide their course of action, and all present agreed not to purchase tea. Instead of dumping it into the harbor, they unloaded the tea and stored it in the Exchange building. Not every colonist accepted this agreement, particularly many merchants, but the colonists now had an established system for dealing with future problems. They established the General Committee to enforce nonimportation agreements and resolutions in the colony. In July 1774 a ship tried to bring tea into Charleston with similar results.
- Charleston Tea Party

Read Our Articles
All Updates About The Suzume no Tojimari

Suzume no Tojimari is a comedy anime about two high school students who form a club in order to get back at the school principal for giving them detention. It follows their adventures as they try to stop him from destroying their town.
Ditch the Car and Travel to Work by Bike

There is a lot of focus on reducing the effects of climate change at the moment and helping the environment. From recycling all the materials that we use using services like this polystyrene recycling company www.printwaste.co.uk/business-recycling-solutions/specific-product-recycling/polystyrene-recycling/ to considering new ways to power our homes using green energy.
Ways To Make Your Mouse Trap More Advanced
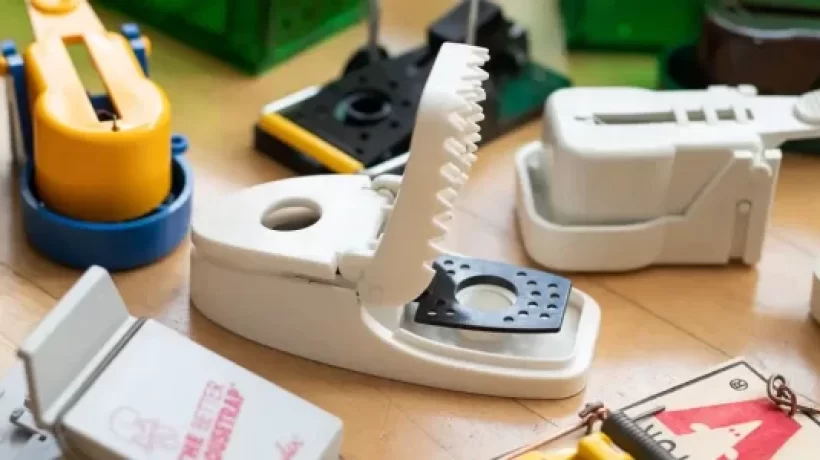
It’s always exciting to be able to explore ways to improve your life in creative fashion, but when you can work with the tools you have at hand, the more possibilities you uncover. That’s just what this article does, too, as it takes a look at seven ways to make your mouse trap more advanced.
Why Are There Seating Areas Under Trees? And Why Should You Care?
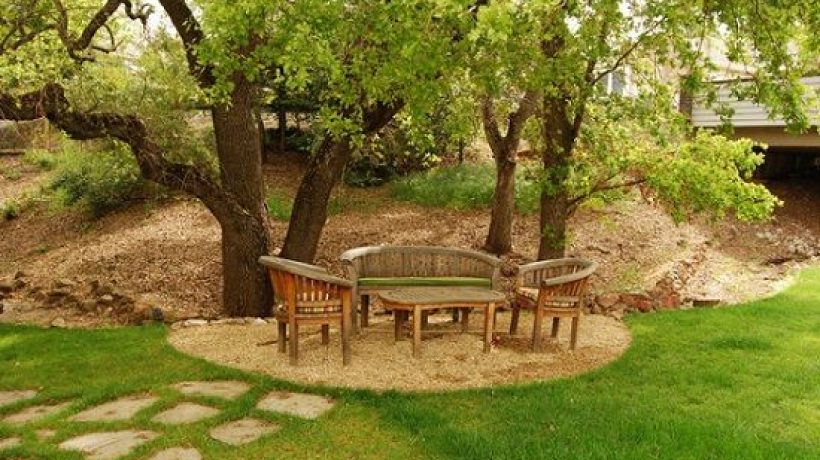
When you walk into a new building, there are many things to take in. One of these is the architecture and design of the space. Take for instance an office building or a bank lobby – you can see that it has seating areas under trees. However, not all people know why there are these seating areas under trees, and what benefits they provide in return. Find out the answers to these questions and more by reading this blog article!
Professional Athlete, Author Lisa Candace Owens’ Bio

Lisa Candace Owens is a professional athlete, author, and an advocate for body positivity. She’s in the process of publishing her first book called Confidence: How to Love Who You Are No Matter What and she took time out of her day to answer some questions about her life and career.
Shailene Woodley Bio: Everything You Need To Know

Shailene Woodley is an American actress and former model. This article is written to provide you with a brief overview of the most important facts about shailene woodley. You can expand your knowledge by diving deeper into any of these sections and learning more about this talented woman’s life!
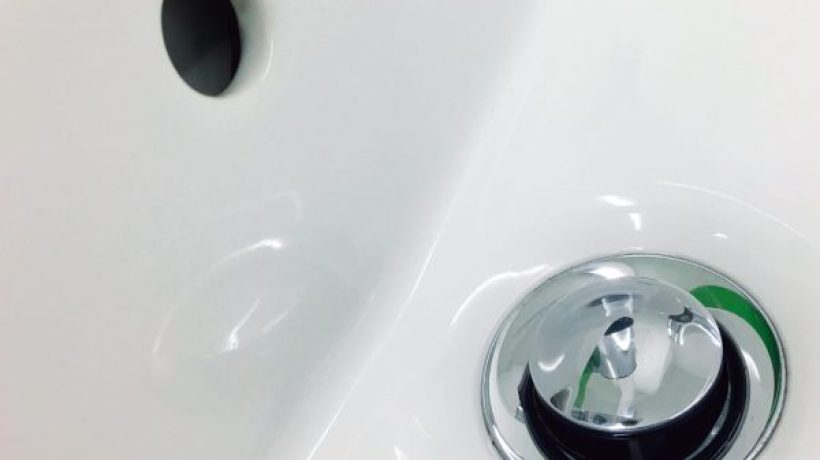
Does Your Shower Need A Trap?
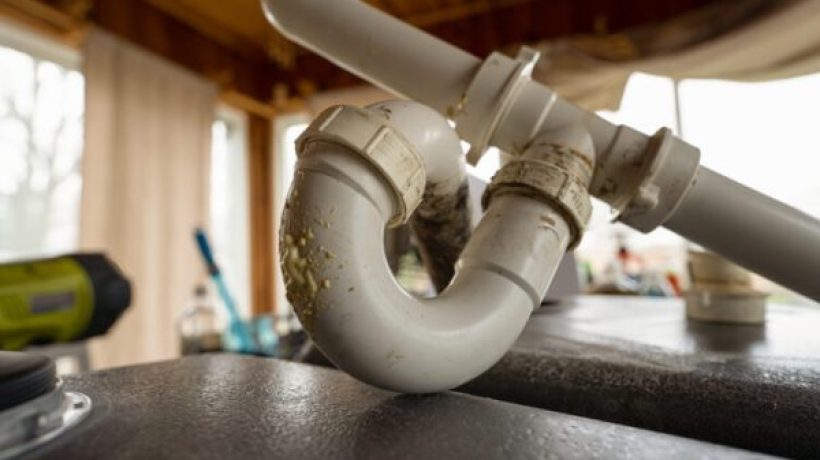
When you first look at a sink or bathtub drain, you may wonder if there is anything at all to prevent the water from flowing out the other end. The answer is yes, there is actually a grate to cover the outlet of your drain; but how do you know if your shower needs one?
Learn How To Properly Install A Shower P-Traps
Installing a shower p-trap is not difficult at all, but there are some steps you should take before taking your shower. These include removing any older p-traps, installing the pipe and connect it to your existing drain, ensuring that the new install won’t trap water, and finally using a bit of pipe sealant around the top of the new p-trap. It’s important to remember to allow enough time for each step so that you don’t have any issues while in the shower.
How Do I Install A Shower P-Traps?
Installing a shower p-trap can be a daunting task, but it’s one that is essential to the overall health and well-being of your bathroom. Here are some tips on how to do it properly:
1. Have all the necessary materials ready before beginning: This includes a drill, screwdriver, wire cutter, and pliers. You will also need some tile adhesive or mortar, as well as a level.
2. Drill a pilot hole into the ceiling below the shower area where you want the p-trap to go. Use the screwdriver to make sure the hole is large enough for the p-trap pipe to fit through.
3. Cut the pipe to proper length and use the wire cutter to remove any sharp edges. Fit the pipe into the hole in the ceiling and tighten down with pliers.
4. Apply tile adhesive or mortar to both sides of the pipe and position it in place against the wall above and below the shower area. Use bricks, blocks, or other weights to hold it in place until it dries (about 30 minutes).
5. Replace any drywall or insulation that was removed during installation, and then position the wall so that it is level across all four sides. Always use a straight edge when installing tile and stone countertops! Let’s learn how to remove shower handle.
What Should I Know Before Installing A Shower P-Traps?
The most common type of shower p-trap is the soffit-mount p-trap. This type is installed onto the roofline of a house, typically in areas that are prone to water damage. Here are some things you should know before installing a shower p-trap:
1. Make sure the area you’re installing your shower p-trap onto is properly prepared. Remove any existing insulation or drywall, and make sure the surface is level and free from any bumps or obstructions.
2. Choose the right type of p-trap for your installation. There are several types of shower p-traps to choose from, and each has its own advantages and disadvantages. If you’re not sure which type of trap to install, contact a professional contractor.
3. Check your plumbing connections before beginning your installation. Make sure all pipes and fittings are in good condition, and that there’s no leaking or other damage.
4. Always use proper safety precautions when working with pipes and waterlines. Wear gloves, eye protection, and a dust mask if necessary.
Why Install A Shower P-Traps?
Installation of a shower P-trap is an important step in ensuring proper water drainage from your shower. A P-trap is a type of drain that sits in the shower head area and catches any water that spills or leaks from the shower head. The water then flows into the drain below, preventing it from flowing back onto the floor and into the shower. Proper installation of a P-trap is essential for maintaining your home’s plumbing system and keeping your bathroom clean and dry. Here are four reasons you should install a shower P-trap:
1. It Keeps Your Shower Floor Clean and Dry: If water accumulates on the floor of your shower, it can lead to mildew and other problems. A properly installed P-trap will prevent this mess from happening and keep your floor clean and dry.
2. It Prevents Water From Spilling Onto The Floor: A leaky shower can cause water to drip onto the floor below, which can be a messy business. A properly installed P-trap will catch any water that falls from the shower head, preventing it from spilling onto the floor below.
3. It Reduces Flooding: A poorly installed P-trap can cause flooding in your house, which can be incredibly inconvenient. A properly installed P-trap will help keep the water in your shower from leaking outside of your shower.
4. It Can Help You Save Money: If you have problems with leaks in your home, a poorly installed P-trap could be costing you money each month. A properly installed P-trap will remain watertight and prevent any leaks from occurring in the first place.
5. It Can Help Protect Your Flooring: In addition to saving your floor, a properly installed P-trap can help protect it as well. Since the trap only allows water to drain into it and not out of it, every time you use your shower, this part of your plumbing system is actually doing something beneficial. Discover the hot ground reverse.
What are the Benefits of Installing A Shower P-Traps?
Installing a shower p-trap can be a great way to improve your home’s indoor air quality, conserve water, and keep your drains clear. Here are the benefits of installing p-traps:
1. Improves Indoor Air Quality: A shower p-trap helps to trap moisture and particles that can lead to poor indoor air quality. By preventing these contaminants from entering your home, you can improve your health while saving on utility costs.
2. Conserves Water: A properly installed shower p-trap can help you conserve water by catching water before it spills onto the floor. This reduces the amount of water that needs to be used in the bathroom and saves you money on your water bill.
3. Keeps Your Drains Clear: A properly installed shower p-trap can help to keep your drains clear. This prevents clogs and backups, which can lead to inconvenience and damage.
If you are looking for ways to improve your home’s indoor air quality, conserve water, and keep your drains clear, then installing a shower p-trap may be the solution for you.
Conclusion
If you’re like most people, you’ve probably installed a shower p-trap at some point in your life. But did you know there are a few things you should keep in mind when installing them? In this article, we’ll walk you through the steps needed to properly install a shower p-trap, so that your plumbing and drainage stay healthy and functioning for years to come. Thanks for reading!
How To Mix Concrete For A Shower Base
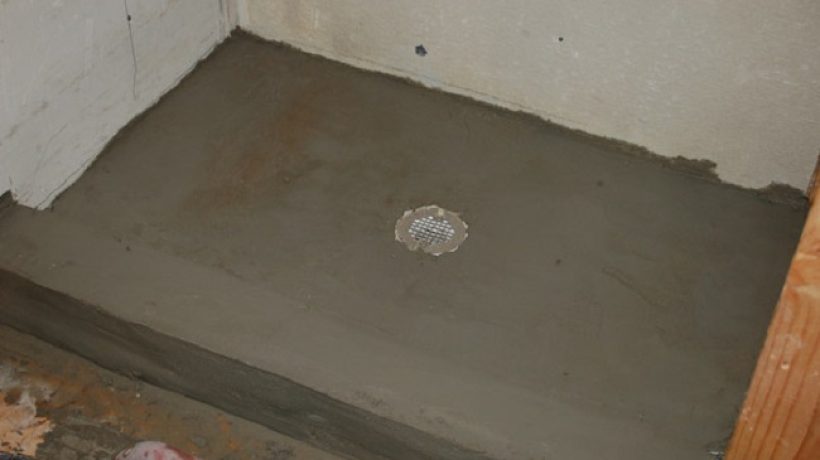
Many people like to add some touches of luxury to their bathrooms by adding a concrete shower base. However, they often don’t realize that it’s quite an involved process and understand the importance of the correct measurements being taken. Read this article on how to mix concrete for your shower, how to purchase and store it, as well as all the steps you’ll need to follow in order to get your project off the ground. Look at the ceiling decorations.
How to Mix Concrete for a Shower Base
Concrete is a versatile material that can be used for a variety of projects, from building foundations to sidewalks. In order to create a sturdy shower base, you’ll need to mix the concrete correctly. Here are four tips for mixing concrete correctly:
1. Use the right ingredients
Make sure that the ingredients you use are of the correct consistency and weight. If the mix is too wet or too dry, it will not form a strong foundation. Additionally, make sure that the aggregate (the small pieces of rock and other earth materials) is of the proper size and type. A coarse aggregate will create a more stable foundation, while a fine aggregate will create a smoother finish.
2. Mix at the correct temperature
Concrete must be mixed at a consistent temperature in order to form a strong foundation. Too cold and the concrete will be too hard; too hot and it will be too soft. The ideal temperature range is 56-72 degrees Fahrenheit.
3. Use the right tools and equipment
You’ll need an adequate mixer, trowel, wheelbarrow, or bucket to mix the concrete properly. Make sure that all of your tools are in good condition and are capable of moving the concrete efficiently.
4. Plan ahead and give it time to cure
Once your concrete has been mixed, it must be allowed to cure for a minimum of 48 hours before actually pouring the foundation. A well-mixed batch will typically take from four to eight hours to complete, so make sure that you have enough time to wait for the concrete to properly set up before moving onto the next step in the process – pouring. Get info about elephant decor.
What is the Cost of a Shower Base?
Whether you are building a new shower or upgrading an existing one, the cost of a shower base can vary drastically. Depending on the materials and labor involved, a basic concrete shower base can cost anywhere from $200 to $2,000. Here are some tips on how to mix concrete for a shower base and save money:
-First, research your options and compare prices. There are many different types of concrete and each has its own unique set of specifications. You’ll need to decide what type of base you want (standing or tub/shower), the size of the finished product, and any special features (e.g. drainage).
-Once you have your cost breakdown, start by calculating the total amount of materials you’ll need. This includes: concrete, rebar, reinforcing steel, sand, gravel, water and mixer.
-Next, figure out how much labor will be required to mix and pour the concrete. This includes breaking down the slab into manageable pieces, mixing the ingredients together in the correct proportions, and getting everything ready for pouring.
-Finally, factor in any extras like caulking or grout. These costs can easily add up if you’re not prepared. Find out germinating seeds in paper towel.
Materials Needed for a Shower Base
The materials needed for a shower base can include concrete, gravel, sand, and water. The size of the shower base will determine the amount of each material that is needed. A standard shower base size is 12 inch by 12 inch.
A concrete mix for a shower base can be purchased at most home improvement stores. The mix should contain enough sand and gravel to make the finished product consistency. Water should also be added to the mix to create a wet mixture. The amount of water will depend on the desired consistency of the finished product.
Once all of the ingredients are mixed together, the concrete should be placed in a form and allowed to set. The concrete should be kept wet while it is curing so that it does not crack or chip. It is important to allow the concrete to cure before using it as a shower base because otherwise water will leak through the cracks and rot the foundation of the shower. Discover diy concrete pool.
How to Keep the Slurry from Draining Out
If you’re using a concrete batch mixer to make your shower base, it’s important to keep the slurry from draining out. Here’s how:
1. Make sure your mixer is well-oiled and in good working order. Old mixers can struggle to mix dry ingredients together, which can lead to drainage problems.
2. Add the dry ingredients first, followed by the wet ingredients. Do not overmix the concrete; you want it to be just smooth enough so that the mortar will stick.
3. Place a piece of plastic wrap directly on the top of the mixture and put the mixer on low speed. Let the mixture sit for 30 minutes so that the concrete can start to set.
4. Use a trowel or a hoe to form the mixture into an even layer about 4 inches thick. Smooth out any bumps or irregularities with your hand.
5. Cover the top of the mixture with another piece of plastic wrap and let it sit for another 30 minutes so that it can harden.
The Top Mistakes with Casting A Concrete Base
If you’re looking to build a concrete shower base, there are a few things you’ll want to avoid. Here are the top mistakes people make when casting a concrete base:
1. Not using the right mix – A poor mixture will result in a brittle concrete that’s difficult to work with. Make sure you use a ready-mixed concrete that’s specifically designed for this purpose.
2. Not using the correct tools – Don’t try to do this project with your hands alone. You’ll need a wheelbarrow, trowel, and pavers.
3. Not prepping the surface – Make sure the surface is completely clean and free of any oils or grease before starting your project. This will help prevent sticking and ensure a smooth finish.
Conclusion
If you’re thinking of building a shower base from concrete, there are a few things you’ll need to know. In this article, we’ll teach you how to mix and pour the concrete, as well as give you some tips on how to make the most of your new shower base. So get ready to start constructing your own dream shower!
What’s So Special About Death Note Season 2?

Death Note is one of the most popular anime series to date. The show follows Light, a high school student who finds and uses a death note – a notebook with the power to kill anyone whose name is written in it – which gives him the ability to change people’s lives. Season 2 picks up where season 1 left off, and while many fans are eagerly waiting for the third installment, they are still asking: What makes Death Note so special?